FPPF: Studio Lighting Fundamentals, Day 1
Today is the first of the three Saturdays of the Studio Lighting Fundamentals under Allan Razo. Just the first day, I already learned a lot!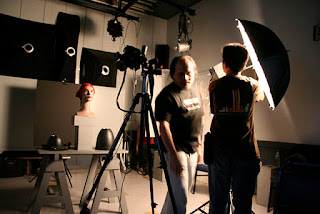
* Use color gels/color filter on the lights to provide color.
* Light is used to create an illusion.
* Use highlights, shadows and focus on the subject.
* Look into the details.
TOOLS/EQUIPMENTS:
1) Flash Head--for example: Broncolor, Hensel, Visetec, Boling.
2) Light Modifiers -- refers to all accessories attached to the studio light.
a) Reflector Disc (metal)
b) Softboxes
c) Umbrella
d) Honeycomb Grids
e) Snoot
f) Barndoors
3) Light Stand
* Honeycomb grids narrow the light.
* As the reflector disc gets bigger, the character of the light becomes softer.
* Barndoors further narrows the light.
TWO KINDS OF LIGHT:
1) Hard (with variations)
2) Soft/Diffused (with variations)
* The different sizes provides the variations in the different kinds of light.
* With studio lighting, we light the surface of the subject.
FACTORS THAT AFFECT CHARACTER OF LIGHT:
* Light modifiers
* Distance of light source/subject
* Size/shape of light modifiers
* Intensity of light
* The closer the light source to the subject, the better.
* The bigger the light source (size), the better.
* For portrait, wattage of light can be from 150-500.
* For group portrait, you may need to get a higher wattage.
* It all depends on what is the purpose.
* Manipulate the light to work with your preferred apperture.
FUNDAMENTAL STEPS IN SETTING-UP LIGHT:
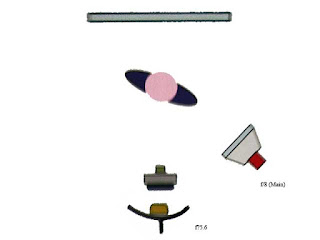
1) MAIN LIGHT
* Light modifier?
* Size/shape?
* Distance/angle?
* Always use your largest light modifier for the main light.
* Main light establishes the correct exposure.
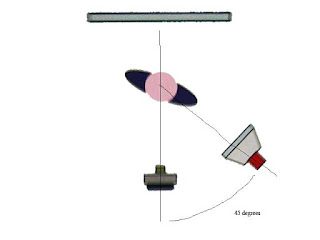
* Main light is normally angled at 45 degrees to create volume and texture on the subject.
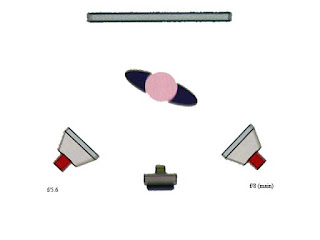
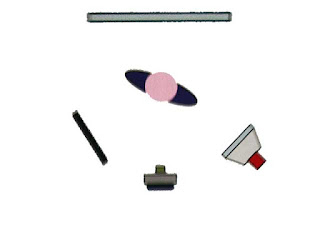
2) FILL-IN LIGHT
* You may use a soft box, a reflector or an umbrella as fill-in.
Soft box as fill-in:
Reflector as fill-in: (safest to use)
Umbrella as fill-in:
3) BACKGROUND LIGHT
* You may use reflector disc as it provides a strong light.
4) HAIR LIGHT
5) KICKER/ACCENT LIGHT
6) FOREGROUND LIGHT
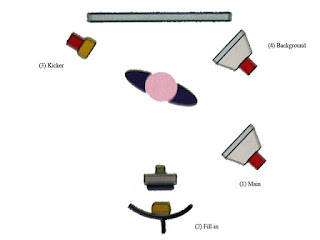
* Normally, kicker lights use a small reflector disc with honeycomb grid.
* The best way to use a flash is in manual mode. Establish first the exposure, e.g. f/5.6 at 1/8, 1/15 or 1/30 shutter speed.

2 Comments:
uhmm,oks po yung mga technical knowledge mo,kelan ka nman tayo ng sarili mong studio?
Malay mo po... Baka magkaroon din ako ng libro ng mga kuha ko. c",)
Post a Comment
<< Home