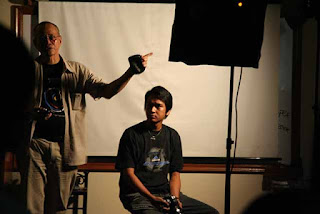
FPPF: Advanced Photography Workshop, 1st Day
It is my first Sunday of the
Advanced Photography Workshop being conducted by the
Federation of Philippine Photographers Foundation (FPPF). From the Basic Photography Workshop, only six of us continued with the Advanced Photography Workshop. The instructor that Sunday is Mr. Vic Sison.
 PORTRAIT
* For portraits, camera should be parallel with the face to remove distortion.
* Lens often used for portrait is twice the normal focal length of the camera's format.
* Example: For a film format which is 35mm. The normal focal length is 46mm (approx. 50mm). Thus, lens for portrait is 85mm-100mm.
* Things to check first:
a) ISO
= For high ISO and to reduce noise, reduce contrast between highlights and shadows; overexposure can also be done.
b) White Balance
= Check also the White Balance Shift. For a warmer image, shift balance +3 to +5 to the right (for Canon users).
c) File Size -- RAW or JPEG
* Activate only one FOCUSING POINT.
* A LIGHT METER measures exact light reading.
* STUDIO FLASH/LIGHT
= Use studio light trigger or IR trigger.
= Without the trigger, (for Canon users) trigger built-in flash of camera (press *) then cover the flash with fingers near the end of the lens when pressing the shutter.
* IDEAL SET-UP's LIGHTING RATIO:
Main light -- 1 stop greater than fill-in light.
Fill-in -- 1 stop weaker than the main light.
Back light or hair light -- 1 stop greater than the main light.
* For GLAMOUR PHOTOGRAPHY, light is in front of the subject.
* Always pose subject's body facing the main light source.
* You can get a reading by closing in on the subject, get reading on skin tone.
* Subject should be one-arm length or four-feet away from the background.
Aliwan Friendship
Woke up early as I would be attending the Friendship Games by our company to be held at
Rizal Memorial Sports Complex. Met with my officemate/friend at McDonald's near La Salle to have breakfast and proceed to Rizal Memorial. It seems several people have the same idea as we saw several officemates at McDonald's, too.
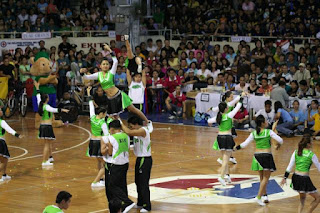
There were raffle draws, mascot competition, muse and cheer dancing competition. We won the mascot competition!
The activity ended around 1PM. We then proceeded to
Harrison Plaza for our lunch. We had ours at
Shakey's. Many of those who attended the Friendship Games also have the same idea of having their lunch at Harrison Plaza.
After lunch, we walked to the Cultural Center of the Philippines (CCP) for the
Aliwan Fiesta. I wanted to take pictures of the parade. At the CCP, there were temporary stalls which sells wares from different regions of the country. We spent sometime looking the items on display.
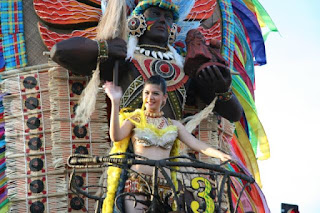
We then walked along Roxas Boulevard to "meet" the parade. It was supposed to start at 3PM at Luneta. We were able to walk from CCP to Malate (near Aristocrat) when we finally came across the first of the twenty participants of the parade. There are several competitions on said festivity:
Reyna ng Aliwan, Dance Parade Competition, and Float Competition.
We then went to
Aristocrat Restaurant for our dinner before proceeding home.
PCCI: Adobe Photoshop for Photographers, Day 3
COLOR CORRECTIONa) Color cast
b) Color manipulation
RED-EYE REDUCTION* Red Eye Tool (under Healing Brush Tool). Just put a marquee around the eye.
COLOR CAST* Unwanted color in the picture. Can be detected on white, black or gray objects in the image (which are considered neutral colors).
* Example: For a white object with a color sampler values R(ed)=250, G(reen)=236, B(lue)=252, Green is week. Thus, color cast is Magenta.
* To know if your image has a color cast, use the Info Palette. Use Color Sampler Eyedropper (be sure to use 3 by 3 Average Sample Size) and place color a neutral color.
* You can only use 4 markers for the color sampler.
TO REMOVE COLOR CAST:
1) Auto-Color
2) Color Balance
a) Open Info Palette.
b) Make a color sampler on the highlight and shadow.
c) Create a Color Balance Adjustment Layer.
d) Adjust appropriate color, checking on the before and after values in the Info Palette.
3) Match Color. Click the "Neutralize".
4) Levels by using the Middle Eyedropper.
a) The middle eyedropper is used to point/mark the middle gray.
b) Find the middle gray:
= Create new layer showing dialog box, choose Overlay Mode and check 50% Gray.
= In the new layer, change Blending Mode to Difference.
= Create Threshold Adjustment Layer.
= Move slider to the leftmost.
= Move slider to the right until the first black appears. That is the middle gray.
= SHIFT-Click for a color sample.
c) Use the middle eyedropper to point to the marked middle gray.
* Correct first exposure before correcting color cast. Improve the over-all brightness, if needed, by moving the middle slider in Levels. Adjust the contrast in Curves. If the color changes, set Blending Mode to Luminosity.
1) Correct exposure.
= Threshold. Look for shadow and highlight using color sampler.
2) Correct color cast.
= Create new layer with overlay mode and 50% gray.
= Set blending mode to difference.
= Threshold. Look for middle gray and mark with eyedropper.
3) Levels
= Click shadow eyedropper (double-click to adjust brightness to 4%) on the marked shadow in the image.
= Click highlight eyedropper (double-click to adjust brightness to 96%) on the marked highlight in the image.
= Adjust middle slider for overall brightness.
4) Curves
= Adjust contrast.
= If color is affected, change Blending Mode to Luminosity.
Another way to remove COLOR CAST:
a) Use eyedropper to look for 50-75% brightness.
b) Brightness is determined in the Info Palette using HSB Color (click on the eyedropper). H(ue), S(aturation), B(rightness).
c) Create new layer.
d) Sample color and fill it to the new layer (Bucket Fill Tool).
e) Invert.
f) Overlay Blending Mode.
* Photo Filter also adjusts color cast.
* Selective Color
a) Any Adjustment Layer for selective color.
b) Color white (for highlight).
c) Adjust colors while checking Info Palette.
d) Since picture would be too bright, change Blending Mode to Color.
COLOR ENHANCEMENTLab TECHNIQUE* Image must be in Lab Mode.
* To saturate the image.
L = lightness
a = green and red
b = yellow and blue
* If the sliders are in the middle in the color palette, the colors of the image are neutral.
* Use Curves Adjustment Layer, mark a point in the center of the graph for each channel.
= In a, if you move the upper right curve to the left, it turns redder. If you move the lower left curve to the right, green gets greener.
= In b, if you move the upper right curve to the left, yellow gets yellower. If you move the lower left curve to the right, blue gets bluer.
= You may also adjust the opacity.
HISTORY BRUSHa) Color Balance Adjustment Layer. Adjust the color you want to improve.
b) Merge down.
c) Put history brush in Merge Down in the History Palette.
d) Go back to original image (Open) and (history) brush the portion of the image you want to improve.
COLOR MANIPULATIONTo change an image's color theme.
a) Curves or Level Adjustment layer.
b) Choose Options.
= Find Dark & Light Color.
= Check Snap Neutral Midtones.
= Double-click Midtones to open color picker.
c) Move the point to the color preferred.
d) Adjust blending mode if preferred.
HUE/SATURATIONa) Hue/Saturation Adjustment Layer.
b) Choose the color you want to manipulate.
c) To know if all of that color is included, move the shadow slider. Use the eyedropper (plus) to add it to that color. Return Saturation in the midle.
d) You may also adjust the types of said color thru the slider.
e) Adjust the hue as preferred.
f) Adjust saturation as preferred.
* If you blacken the sky (lightness), saturate accordingly.
MATCHING COLORWhen you have images with different color theme and you want to match the selection of an image to the color theme of the other image so that selection would be added to the target image.
a) Color or Levels Adjustment Layer.
b) Options:
= Find Dark & Light Colors.
= Double-click Shadows and pick the shadow in the other image.
= Double-click Highlights and pick the highlight in the other image.
c) Merge Down layer.
d) Copy to the other image the adjusted selection.
GRADIENT MAPa) Be sure foreground/background is in black and white.
b) Use Gradient Map Adjustment Layer.
c) Double-click gradient to open gradient picker.
d) You may choose the color via color picker or color from the another image by clicking when moving the slider.
e) You may copy the adjustment layer to another image by dragging the adjustment layer to that image.
MATCH COLORa) Be sure target image is active.
b) Do Image>Adjustment>Match Color.
c) Modify "Source".
d) Adjust those you don't want to modified using History Brush.
e) Also, you can specify a portion of the source and a portion of the target.
= In image statistics, both "use selection in source to calculate color" and "use selection target to calculate adjustment" is checked.
= Be sure to check "ignore selection when applying adjustment".
Another way of MATCHING COLOR (like Skin Tones):
a) With your reference image, look for point with about 75% brightness (HSB) and color sample. Remember the RGB value.
b) With your target image, look for a point with the same brightness as the reference image and color sample.
c) Create Curves Adjustment Layer.
d) Create a point in the channels. You create a point in the composite (RGB) by pressing CTRL-click. You create a point on the channels (R, G, B) by pressing CTRL-SHIFT-click.
e) For each channel, adjust the output based on the RGB values of the reference image.
CHANGING BACKGROUNDBACKGROUND ERASER1) Copy the image to a new layer.
2) Add a new layer (while pressing CTRL) at the bottom of the layer. Fill in with a color. This layer will be used to check if the erasing of the layer above is clean/complete.
3) Choose the brush style.
4) Choose the sampling.
= Continuous--what's under the brush is erased.
= Once--click to get the color to be erased and drag the mouse.
= Background swatch--what is in the background swatch is erased.
5) Choose the limits.
= Discontiguous--what is erased is that within the brush.
= Continguous--what is erased is that under the crosshair.
= Find Edges.
6) Adjust tolerance.
7) Click Protect Foreground, if needed. But you need to adjust from time to time the foreground color by ALT-click on the image.
PUTTING AN IMAGE AS A BACKGROUND OF ANOTHER1) Duplicate image or make the image as a layer.
2) On the duplicate layer, double-click the thumbnails to open the Layer Style.
3) In the "Blend If", look for the best channel with the less presence of the color you want to remove. The lighter it is, the more presence of said color; move the slider to remove the color. To smoothen, split the slider by pressing the ALT key while dragging the slider.
4) Move the image to the target image.
5) Use Hue/Saturation Adjustment Layer to further remove unmatched color by desaturating in said color's channel.
6) Merge new layer and adjustment layer.
LUMINANCE MASKING* Using the channels in the palette to look for the best mask (high contrast; with blur).
* Duplicate the "best channel"; then Threshold. Levels can also be used to adjust contrast.
* Feather the mask/selection via Filter>Blur>Gaussian Blur.
* Back to the Layers Palette, put a new layer below the image where the new background would be.
* In the layer to be edited, load selection and delete.
* If the background is still in the image, use Layer>Matting>Defringe.
EXTRACT* Highlight (Brush) the edges of the image to be retained, including in the highlight a part of the foreground and the background.
* Fill with "bucket" to see if the selection did not "leak".
* Use ALT+Eraser to add details that has been removed.
* To toggle between freehand and smart highlighting, press CTRL.
* Smart highlighting is used for solid edges; freehand for fuzzy edges.
* To change the background of crystals, refelctions, see-through objects, use the highlighter all throughout the image (do not use bucket to fill). Then, check the Force Foreground to get a color sample (eyedropper) of the foreground.
CAMERA RAWADJUST1) Remove color cast, if needed.
= Eyedropper--get something white with details; or
= White balance; or
= Temperature (blue or yellow); or
= Tint (green or magenta)
2) Adjust exposure, if needed, avoiding spike as it means you are loosing details.
3) Adjust shadows, avoiding spikes.
4) Adjust brightness.
LENSAdjust to correct the fringes.
Detail--to remove noise by sharpening
Curves--to adjust contrast
* DNG is the standard CAMERA RAW format.
PROFESSIONAL SHARPENING* The last step before printing the image is sharpen it.
* Fade command appears right after the "tools" and "filters". Fade can lessen effect or can use Blending Mode.
* Increase the contrast between pixels that lies at the edges.
UNSHARP MASK* Amount -- controls the intensity of the sharpness depending on the radius of affected pixels; usually between 100-120.
* Radius -- affected pixels; usually up to 2 pixels.
* Threshold -- to compensate for areas you don't want affected; difference between two pixels to determine if it is the edge.
* Always view the image 100% while sharpening.
* Always create a Sharpening Layer
= you can adjust the opacity, or
= you can use a layering mask so that only the areas you want to change will be sharpened
* You can view the before and after by hovering the mouse in the sample image at Unsharp Mask Window and click-unclick.
EDGE SHARPENING* Image should be in CMYK.
* Only sharpen the black channel.
For RGB:
a) Select All.
b) Copy.
c) Goto Channels and create a new channel.
d) Deselect.
e) Paste to the new (alpha) channel.
f) Filter>Stylize>Find Edges.
g) Image>Adjustment>Invert. You can erase the edges you don't want affected.
h) Levels to thicken the white areas by moving the sliders.
i) Filter>Blur>Gaussian Blur.
j) Back to Layers, make a copy of the image.
k) Load selection of new channel.
l) Filter>Sharpen>Unsharp Mask. Image is over-sharpened if white appears like a halo.
m) If you do not want to change the color, use Luminosity Blending Mode in the layer.
EMBOSSa) Duplicate image.
b) Filter>Stylize>Emboss. How high the height determines sharpness.
c) Overlay Blending Mode.
d) Color with gray those you don't want affected.
HIGH PASSa) Duplicate image.
b) Filter>Other>High Pass. Change in Radius affects sharpness.
c) Color with gray those you don't want affected.
d) Overlay Blending Mode.
SMART SHARPEN* Amount -- usually below 120
* Radius -- much lower setting when using Unsharp Mask.
* Remove
= Gaussian Blur -- same logic for Unsharp Mask
* Lens Blur -- commonly used for Smart Sharpen.
* Motion Blur
* Smart Sharpen can save settings.
NOISE REDUCTION1) Lab Mode
a) Convert image to Lab.
b) In the Channels, the details is in L, a and b have the noise.
c) In the a channel, do Gaussian Blur and adjust until it blends.
d) In the b channel, do Gaussian Blur, too.
e) If you want to sharpen, sharpen only the L channel.
2) Filter>Noise>Reduce Noise
* Usually reduce Color Noise is adjusted.
* For JPEG, can check Remove JPEG Artifacts.
* Can save settings.
* In advanced, adjustment is in per channel basis.
PORTRAIT RETOUCHINGREMOVING EYEBAGS1) Duplicate image.
2) Healing Brush (not closing as the Clone Tool copies contrast, color and texture). Healing Brush clones only the texture.
3) Adjust Opacity.
Note: With CS2, create Layer and check Sample All Layers. Healing Brush then adjust Opacity.
REMOVING WRINKLESBLUR1) Create Layer.
2) Blur Tool, adjust to Lighten.
3) Start with the younger lines.
4) Adjust Opacity.
PATCH TOOL1) Select area with "Source" checked.
2) Move selection to area you want to copy.
REMOVEING BEARD/SHAVE1) Filter>Noise>Dust and Scratches.
2) History Brush and Lighten Mode.
SLIM DOWN NOSE1) Lasso Tool nose.
2) Feather.
3) Convert to layer (CTRL-J).
4) Free Transform (CTRL-T).
5) Perspective (ALT-CTRL-SHIFT).
SLIMMING DOWN1) Filter>Liquify
2) Push Left Pixel (if mouse is moved down, push pixels to the right; move mouse up, push pixels to the left).
SLIM DOWN FACE1) Free Transform.
2) Select All and move grid about 5%.
REMOVE FRECKLES1) Filter>Blur>Gaussian Blur.
2) History Brush.
3) Lighten Mode.
REMOVE BLEMISH/PIMPLES* Spot Healing Brush. Brush size should be as big as the blemish.
BLOOD-SHOT EYES1) Select the eye.
2) Hue/Saturation Adjustment Layer.
3) Red Channel and Desaturate.
ENHANCE FACE1) Create two layers (copy of image).
2) Name one layer as DARKEN. Blur>Gaussian Blur. Darken Blending Mode; 40% Opacity.
3) Name the other layer as LIGHTEN. Blur>Gaussian Blur (60%). Lighten Blending Mode.
4) Hide Background.
5) Create new layer.
6) Click. Merge Visible. Opacity should be 100.
7) Create Layer Mask and brush.
BLUR BACKGROUND1) Gaussian Blur
2) Lens Blur
* Used to simulate DOF in photography.
* Prepare mask in the Channels template.
* Filter>Blur>Lens Blur. Automatically applies the mask. Be sure to load the alpha channel in the Depth Map Source.
SMART OBJECTS1) Use the "Place" command and look for the images (File>Place).
2) Smart Objects can be replaced by right-clicking and choosing new image.
* Smart Objects are good for collage templates.
CONVERTING TO BLACK AND WHITECHANNEL MIXER1) Adjustment>Channel Mixer.
2) Click Monochrome.
3) Play with the RGB Channels: Red=Contrast; Green=Details.
* Convert to Grayscale.
Lab* Remove a and b channels.
RGB* Remove blue and green channels.
CALCULATIONS* Calculations. Convert to grayscale.
HUE/SATURATION1) Desaturate Master Channel.
2) Adjust lightness for the other channels as desired.
3) Convert to grayscale.
NON-DESTRUCTIVE TECHNIQUESa) Adjustment Layers
b) Layer Mask
c) Blend-If
d) 16-bit image
PCCI: Adobe Photoshop for Photographers, Day 2
Definitely having a fun time. For one, I am learning new things in which I am interested. At least, even for a few days, will forget about work and the pressures of the merger.
Back to my notes...
TONAL ADJUSTMENTa) Adjust exposure
b) Contrast--if low contrast, image is flat
HISTOGRAM shows how the brightness of the image is distributed. When looking at histograms, you do not want sparks at both ends.
ADJUSTMENTS:a) Auto-Contrast
b) Auto-Level
c) Curve's Auto -- In the Options, similar to auto-contrast if "Enhance Monochromatic Contrast" is chosen, similar to auto-levels if "Enhance Per Channel Contrast", and auto-color of "Find Dark & Light Colors".
d) Equalize -- Balances light and dark.
LEVELS1) When adjusting the sliders, press the ALT key.
= When moving the left slider, stop when you see a color/black appears.
= When moving the right slider, stop when you see a color/white appears.
* The Output Levels determine the shadow and highlight that can be printed by the printer.
Minimum Highlights for Publication:
Newspaper -- 5%
Magazines -- 3%
High-End Brochures -- 3%
Maximum Shadow for Publication:
Newspaper -- 75%
Magazines -- 90%
High-End Brochures -- 93%
2) Another way is to use the sampler (limited by the output levels).
= Press ALT while moving the left slider to the right, get color sampler for the shadow.
= Press ALT while moving the right slider to the left until white appears to get the color sampler.
= Double click the Eyedropper/s to adjust the Output Levels based on what the printer can print, e.g. if printer can only print 10 for shadows, put 10 in R, G, and B; if printer can only print 245 for highlights, put 245 in R, G and B.
3) Another way is to use Threshold in the Adjustment Layer. Threshold is used to determine the shadows and highlights by using New Fill or Adjustment Layer. Move the slider to the left. Slowly move the slider to the right until black appears. Mark the shadow by pressing SHIFT-click on the image. Move the slider to the rightmost and slowly move it to the left until white appears. Mark the highlight by pressing SHIFT-click on the image. Use the appropriate eyedropper to color sample using the "marks" or "guides" on the image.
* The middle slider is for the Midtones that can lighten or darken the overall image.
CURVES* Press ALT-click to switch to a fine or big grid.
* Click on the graph to mark a point. You may use the UP and DOWN ARROW keys to adjust.
* Tonal adjustment is somewhat sharpening the image.
* Another way to mark the graph is to go to the image and press CTRL-click on the part of the image you want to improve.
* There can be several marks in the curves to adjust for the highlight and shadows. Temporarily use Threshold in the Adjustment Layer to look for the shadows and highlights.
* An S-curve adjusts the contrast. The steeper, the higher the contrast.
* If the color has been affected and you just want to adjust the brightness and contrast, use Luminosity Blending Mode.
ADJUSTMENT LAYER:* Non-destructive
* Opacity control--to reduce the effect
* Blending mode -- e.g. luminosity
* Layer mask--limit the effect of the adjustment
* For OVEREXPOSED IMAGE, copy a layer and use Multiply Blending Mode. Best is to make an adjustment layer and Multiply (copying a layer increases file size; adjustment layer does not increase file size).
* For UNDEREXPOSED IMAGE, do a selection you want to lose the details by creating a mask. Inverse selection, create Adjustment Layer, Screen Blending Mode.
* You may use gradient for mask.
* Blending Mode Hard Light increases contrast; can be combined with levels. Soft Light and Overlay Blending Modes can also be used for contrast.
SHADOW/HIGHLIGHT* Improve shadows.
* Used for back-lit images.
* When the picture "flattens" as you lighten the shadow area, click Show More Options in order to adjust the Tonal Width and Radius. When you adjust the Tonal Width, you specify the area around the shadow (affecting midtones, etc.). The same is true for the highlights to adjust overexposed areas of the image.
* If you want to improve SELECTIVE SHADOW, use Layer Mask.
a) Duplicate image.
b) Screen Blending Mode.
c) Create Layer Mask (press ALT+Add Layer Mask).
d) Paint the area you want to adjust.
* Another way to improve SELECTIVE SHADOW is to use History Brush.
a) Copy background.
b) Blending Mode Screen.
c) Right click on new layer to Merge Down.
d) Put History Brush in History Palette's Merge Down.
e) Click History Palette's Open.
f) History brush on the area of the image you want to improve.
(SELECTIVE) DODGE/BURNa) Create A New Layer (press ALT-Create A New Layer) where a dialog box will appear. Change to Overlay Mode and check the Fill With Overlay Neutral Color (50% Gray).
b) Perform dodge or burn on the new layer.
(SELECTIVE) COLOR RANGEa) Use Select>Color Range to choose the highlight, or shadow; then Copy To A New Layer (CTRL-J).
b) Adjust using the new layer.
c) Don't forget to Feather selection.
* To select the luminosity of the image, CTRL-ALT-1 (for older version, CTRL-ALT-~). Feather (CTRL-D). Copy to a new layer (CTRL-J). Blending mode.
* NOTE: Always Feather after making a selection.
EXPANDING THE DYNAMIC RANGE* If the image to be taken exceeds the dynamic range of the camera, take two images.
* In Photoshop, combine the two images with one images as the Layer (press SHIFT while moving the other image to align). To check if the image is aligned, use the Blending Mode Difference. If there's a white on the edges, the image is not aligned. Then, Add A Layer Stlye. Adjust Blend If's This Layer by adjusting the slider in order for the image below to come up. For smooth transition, split the slider by pressing ALT while moving the slider.
NEUTRAL DENSITYa) Be sure foreground/background color is black and white.
b) Create Gradient Map Adjustment Layer and choose gradient type.
c) Blending Mode Overlay.
d) Double click on the new layer then double click gradient to open Gradient Editor.
e) Adjust gradient by moving slider for opacity or color.
PCCI: Adobe Photoshop for Photographers, Day 1
Yes-yes-yo! It will be the first day of my three-day workshop at
Philippine Center for Creative Imaging (PCCI) on Adobe Photoshop for Photographers. Our instructor is Mr. Jun Miranda, one of the two certified Adobe Instructors in the country. The other instructor is also one of the instructors of PCCI.
Now, just to list my notes...
ADOBE BRIDGE* A way of organizing photographs.
* Alt+G, to access copyright.
* Shows metadata--file properties, IPTC, camera data (EXIF), camera raw.
* CTRL-T, hide temporarily file information.
* CTRL-K, show the preferences window.
* SHIFT-ALT-CTRL, to define keyboard shortcuts.
* Mandatory keyboard shortcut (user-defined)
CTRL
FUNC
* Stored in Keyboard Shortcuts>Preset.
* To create a new document preset: New File, Adjust Settings, and Save Preset.
* To create a tool preset, drop down on the upper left and Save Tool. To arrange the presets, use Preset Manager.
CAMERA RAW WORKFLOWa) Shoot in Camera Raw
b) Basic retouching in Camera Raw
c) Cleaning and further retouching in Photoshop
d) Local Tonal and/or Color Corrections
e) Sharpening
f) Saving Format
Sharpening and Saving Format depends on output medium (targetting).
* For Camera Raw, every channel is 12-bit (4096 bits); in JPEG, it is converted to 256 (8-bit).
* Exporting Camera Raw to Photoshop is non-destructive as a copy of the Raw file is made.
PHOTOSHOP WORKFLOWa) Shoot in JPEG
b) Global tonal adjustment in Photoshop
. . .
c) Global color corrections
JPEG Artifacts is when an image becomes blocky as quality diminishes; high compression loses color information.
* CROPPING. If you have several images and you want to have the same image size, in one picture, adjust setting, click "Front Image". You may now crop the other images using the "Front Image's" setting.
* FILTER. Filter>Distort>Lens Correction
Barrel
Perspective
Vignette
* If a big image is copied to a smaller canvass, press SHIFT while dragging to new canvass. Press CTRL-T (free transform) and CTRL-0 (to view whole image on its window). To adjust the new image, press ALT-SHIFT while dragging the corner of the image to fit the smaller-sized canvass.
* TRANFORM. Transform cannot be used to a Background. Double click the Background to change it to a Layer.
* To correct skewness of an image, use Free Transform. So that only one side would move, press CTRL while dragging the corner of the image to correct.
* To straighten a skewed image, use Measurement Tool then Rotate Arbitrary.
* Press CTRL-SHIFT-ALT to adjust skewness on both sides of the image at the same time.
After the training, walked my way to the corner of Pasay Road and Pasong Tamo. Went to
Waltermart to buy a few items.
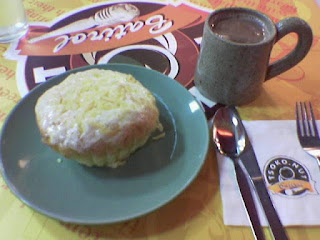
It is there (Waltermart) where I saw the
Tsoko Nut Batirol. When we had SSEAYP delegates as guests, I was supposed to treat them there. So, I had my very late merienda of ensaymada and hot chocolate. c",)
FPPF: Basic Photography Workshop, 4th Day
It is the last Sunday for our Basic Photography Workshop. After a lecture in the morning, there would be judges on the portrait we submitted. After which, a simple graduation and program.
First, the lecture on
POSING.
* There are three kinds of poses: the I pose, the C pose, and the S pose.
* Three things to consider when posing: (a) Posing the slimmer side of the face. (b) Movement of the legs. (c) Position of the arms.
* Pose the slimmer side of the face (the smaller eye is the slimmer side, and should be nearer the camera). The body faces the light source and the face on the camera.
* Move one leg at a time, affecting the shoulder. For women, the higher shoulder should be facing the camera. For men, the lower shoulder should be facing the camera.
* With women, don't pose the arms in contact with the body so that the arms will be slim.
Before we left for the day, there is a short lecture on
FILTERS.
NEUTRAL FILTERS -- no color
a) Neutral Density (ND)
ND2 -- 1 stop
ND4 -- 2 stop
ND8 -- 3 stop
b) Skylight
c) UV
d) Correction lens
e) Diffuser
f) Polarizer -- For auto-focus lens, it should be circular polarizer.
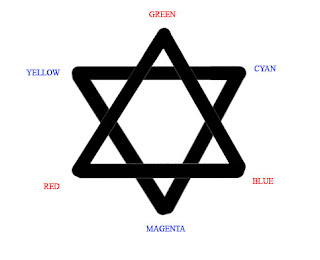
COLOR FILTERS -- If you want to lighten a color, use that color's filter. If you want to darken a color, use the color filter opposite to it in the color wheel.

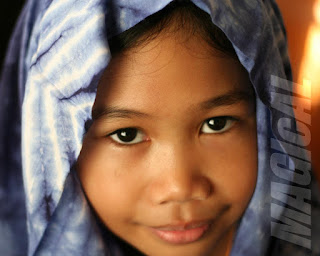
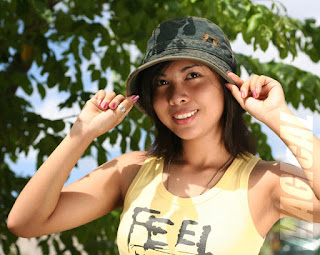
BTW, the portrait I submitted is that of my niece holding her hat. For one, it got the most votes in my survey. I would have chosen the one with her hair covered, but I made priority on the sharpness of the eyes since, for portraits, focus should be on the eyes.
My photo did not even land in the top ten chosen by the judges (sad). But then again, based on their choices, you would know the judges' discipline--photojournalism. My niece with her hair covered would have a fighting chance... LOL.
Stranger Photo
I still have to take a portrait for submission to my basic photography workshop tomorrow. Thus, I made an "appointment" (hehehe!) with my nieces who would be my models.
The requirements: 8x10 photo on a Fuji paper, portrait taken with natural light.
Woke my nieces up as the light in the morning is the best time to take pictures (aside from dusk). Took several pictures at home. We also went to the
Cultural Center of the Philippines Complex for more photo shoot.
After the photo shoot, went to
McDonald's for our late breakfast. Spent some time there as we are waiting for
Cerealicious to be open (which would open around 11AM). When we arrived at the shop of Cerealicious, they would not open that Saturday!!! Geeezzzz... Thus, decided to go back home.
After lunch, went to Glorietta to have my pictures developed. Already made a survey at home for the photos to be printed--one for each of my nieces. Dropping it of at the
Fuji Developing Center at
Gift Gate, Glorietta, proceeded to the
Glorietta 4 Cinemas to watch a movie.
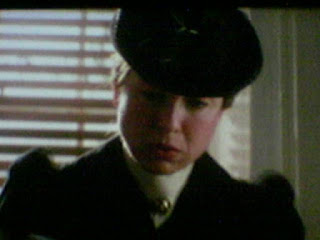
 Perfect Stranger
 is a drama/thriller starring Halle Berry and Bruce Willis. Investigative reporter Rowena Price (using David Shane as her pen name) has to go undercover to investigate the death of her friend, whose death may be connected with the rich and powerful advertising executive Harrison Hill. As the truth slowly surfaces, we ask: how far would we go to keep a secret?
After the movie, picked up my pictures and proceeded to Glorietta 4 near Mercury Drug where the anticipated Mass is held. While waiting for the priest, asked some of my neighbors to pick one picture which they liked best. Hehehehe!
FPPF: Basic Photography Workshop, 3rd Day
Not all submitted their "assignment" on still life. Thus, have to wait for next week to see what the others came up with. Although, already saw some, that from their pictures, they really made the effort to come up with good images.
For this Sunday, we had a video presentation showing the
Ten Universal Principles of Great Art. And they are...
* Unity
* Harmony
* Will
* Strength
* Intuition
* Balance and Contrast
* Simplicity and Purity
* Empathy and Compassion
* Truth
* Universality
How to create art:
* Conceptual stage
* Design or planning stage
* Design implementation
* Audience appreciation or reaction
With
STILL LIFE, one should look for:
* Shape
* Form
* Texture
* Color
* Size
Lighting still life objects:
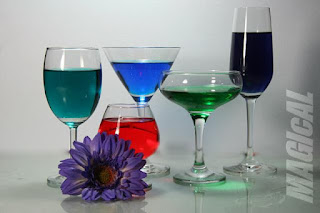
* For CRYSTALS, light the background.
* For SPHERES, top-right-back.
* For HIGHLY REFLECTIVE OBJECTS, put the object in a tent.
You can do a make-shift tent by using a
balikbayan box, cut the left, right and top side of the box to put a tracing paper as diffuser. This is where you would provide the light. An opening in front of the box is for the camera.
There are three kinds of POSES: 2/3 pose, frontal and profile.
* FRONTAL lighting is good for elderly ladies to lessen the wrinkles.
* BUTTERFLY LIGHTING is putting the light front-overhead. With butterfly lighting, you create a butterfly shadow below the nose. You can use a reflector to lighten the shadow.
* The LOOP is where the shadow of the tip of the nose points to the edge of the lip but do not "close" the shadow.
* REMBRANDT is the same as loop but the shadow of the tip of the nose touches the edge of the lips, creating a triangular highlight in the cheek.
* SHORT-LIGHTING is used to make a person thinner. It is said to be short-lighted if the shadow is near the camera.
* BROAD-LIGHTING makes a person fatter. Here, the shadow is farther from the camera.
With STUDIO LIGHTING, there can be one, two or more sources of light. If you have a two light set-up, the main source of light should be behind the camera.
Fo-to
A movie marathon last Saturday... there's no more movies for me to watch this week!
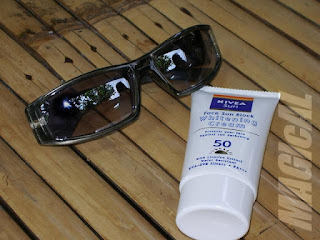
Thus, decided to (window) shop for camera accessories.
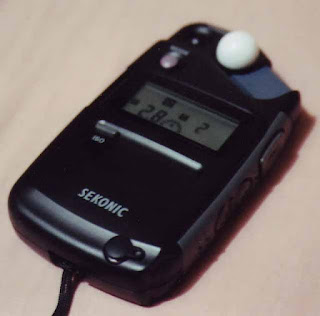
Went from one camera shop to another to canvas, and came up with this: Canon EF 100mm f/2.8 Macro USM and a Sekonic light meter.
Can't wait to play with my new "toys"... after attending the anticipated Mass. c",)
Assignment: Still Life
No photography class last Sunday (Easter Sunday), we were given an assignment by our instructor: take a picture of still life objects. We have to e-mail it to him by Friday.
Since it is the last day of our five day vacation, tried my hand with it...

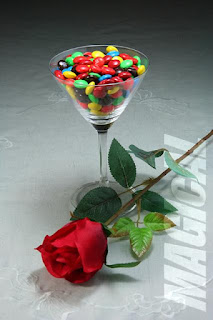

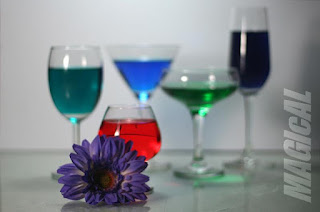

What do you think?
Cuyab Easter
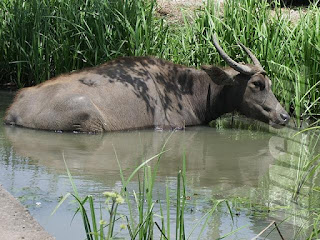
The likely for us to have a long vacation is nil, considering the coming election. Thus, jumped at a chance to go swimming even for a day.
Woke up really early to go to
Aristocrat Restaurant to buy food for our "outing". Since the restaurant is near Malate Church, was able to witness the "
Pagsalubong". There is a two procession, one with the image of Mother Mary and another with that of Jesus. They meet at a certain point where an angel (a child dressed like an angel) lifts the black veil covering Mother Mary's face.
After picking up the food, went back home to pick up the rest of the gang who would be joining in our mini-outing. The travel to Laguna is smooth and quick as there are only a few cars on the road. Stopped by
McDonald's to buy our breakfast and proceeded to
Cuyab Hot Springs Resort.
As soon as we arrived at Cuyab, picked up a cottage. Left the rest at Cuyab to buy first a
pasalubong. With Manong and one of my nieces in tow, we went to
D'Original at Los Banos, noted for their
buko pie. There were already a lot of cars in front of the store. Bought several boxes of
buko pie and some
espasol. c",) Then proceeded back to Cuyab.
We spent the morning swimming and eating. A few hours after lunch, packed up our things and went back home. We sure feel refreshed. As soon as we arrive home, were snoring our heads off! Hehehehe!
A Reaping Miss Potter
Decided to do a movie marathon today. The malls have been closed for two days for the observance of Maundy Thursday and Good Friday. For one, many people would probably be on vacation that there will only be a handful of moviegoers.

Started with
The Reaping. Starring Hilary Swank as a former Christian missionary who lost her faith after her family got killed in one of her missionary works. She then turned to science to disprove any religious phenomena. Until she was asked to investigate the occurrences in a small Louisiana town that seems like the Biblical plagues. She must regain her faith to combat the dark forces threatening the community.
As you watch the movie, you are being led to believe one thing and ended up with another. If there is a sequel, which I think there would be, I would be the first to watch it.
Next stop is
Miss Potter. Starring Renee Zellweger as Miss Beatrix Potter, famous for her books about animals such as Peter Rabbit and Tom Kitten. There are funny moments for there is a childlike quality about Miss Potter, maybe one of the reasons her stories/books are popular to children. Even scenes involving her nanny makes the audience laugh.
Back to Cavite
Normally, we spend the Holy Week at my aunt's rest house at Candelaria. For this year, we opted to spend it at home and go to
Tatang on Good Friday.
There were already a lot of people when we arrived there. There are several times
Tatang went into a trance. While in a trance, he preaches. He also answers questions you throw at him and prays for the people there.
We left the place in the afternoon, stopping by
Kentucky Fried Chicken (KFC) for our late lunch.
Sunday, February 23, 2025
Albularyo (shaman or witch doctor), the occult, superstition is a sin for it violates the First Commandment. One has to confess this; then reject, renounce and rebuke it.
Holy Wednesday
It is the last working day for the week as the country remembers the death and passion of Christ.
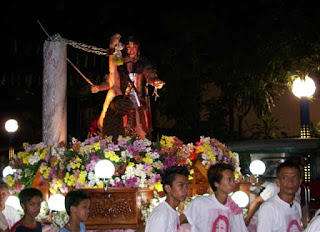
Have to alight the passenger jeep I am in as the traffic is very heavy. Good thing, it is just a few blocks away from home. The cause of the traffic is a procession of images depicting Jesus sacrifices as He offer His life to save us.
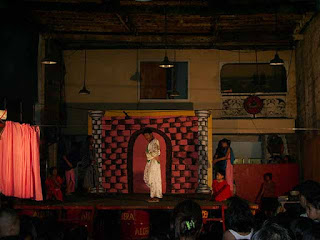
On the other hand, near our house is a makeshift stage wherein a
Senakulo (translation: passion play) is being depicted.
At least, not all considers the short respite as a vacation extravaganza; but, a time for reflection...
FPPF: Basic Photography Workshop, 2nd Day
It is the second Sunday for the workshop. Was early at Fort Santiago. The early birds "shared" the pictures they have taken. Decided to submit my picture of the
karwahe as the best picture I took last Sunday. There were several, actually. Hehehe! (See picture I posted last March 25, 2007.)
For that Sunday, it was composition and flash photography.
With
FLASH PHOTOGRAPHY, considerations are:
a) flash-sync shutter speed
b) aperture
f = guide number / flash to subject distance
example: GN = 160
a) 160 GN / 10 feet = f16
b) 160 GN / 20 feet = f8
There are different types of flash:
a) manual
b) auto thyristor -- have 2 effective apperture
c) through the lens (TTL)
For
COMPOSITION, the following should be considered:
- Keep it simple.
- Tell a story.
- Observe law of thirds.
- Give subject a breathing space.
- Keep subject off-center.
- Observe lines.
- Frame your subject.
- Blur background to emphasize subject: wide aperture, zoom lens, macro, or reverse the lens.
- Accent composition.
- Use statis aperture to achieve deep depth of field.
- Draw composition.
- Consider perspective or viewpoint.
- Bracket composition: horizontal/vertical, near/far/medium, exposure.
- Use interesting foreground.
- Do not shoot bald skies.
- Reduce object into abstraction.
- Include triangle in your composition.
Oh! By the way, my picture got the most votes for being the best picture. YES! c",)


